MEMORY KEEPING
How to Convert VHS Tapes to Digital (Every Realistic Option, Ranked by What Actually Works)
Every VHS tape in that closet is on a chemical clock — and the VCRs that can read them are disappearing faster than the tapes themselves. Here's how to actually digitize a box of home movies, from the DIY route that only makes sense for a few tapes to the mail-in service most families end up using.
There are two things you learn the first time you actually sit down to convert a VHS tape to digital. The first is that magnetic tape is on a clock — the binder that holds the magnetic particles is slowly breaking down every year in every closet in the country, and past a certain point the tape either sticks to the heads (the dreaded 'sticky-shed syndrome') or fades to a wash of noise. The Library of Congress's own preservation guidance puts the useful shelf life of consumer VHS at 10-25 years under ideal storage; most family tapes are now well past 25. The second thing you learn is that the machines that can play these tapes are disappearing faster than the tapes. Panasonic stopped making VCRs in 2016. Working, well-aligned decks are getting scarce on eBay, and the technicians who can service them are retiring.
So the question isn't really 'should I digitize.' It's which method makes sense for the size of your collection and how much of your time you're willing to spend. This guide walks through the three realistic paths — DIY with a USB capture device, a mail-in professional service, and a local video-transfer shop — with an honest read on cost, quality and what breaks in each. If you only have two or three tapes and you enjoy the tinkering, one route wins. If you have a shoebox of mixed formats, a completely different route wins. The 'wrong' choice isn't dangerous, but it usually costs the person who made it either weeks of weekend evenings or a couple hundred dollars they didn't need to spend.
First: why you should not wait another year to do this
Magnetic tape degrades whether you play it or not. The polyurethane binder that holds the magnetic particles onto the plastic base absorbs moisture from the air and slowly hydrolyzes, breaking down into a sticky residue. That's sticky-shed syndrome: when the tape gums up the heads on the first play, and the only way to (temporarily) fix it is to bake the tape at low heat for hours — a process no consumer setup can do safely. Once it starts, every play makes it worse, and the tape can be unrecoverable in a season. Heat and humidity accelerate everything; a tape stored in a hot attic is dying materially faster than one in a climate-controlled closet.
The hardware runs on the same countdown. VCRs stopped rolling off the line in 2016, and the S-VHS and Hi-Fi decks that produce the cleanest transfers were already vintage by then. On the used market, decks that actually track cleanly and don't chew tape are getting rarer and more expensive each year. Camcorder-format tapes — 8mm, Hi8, MiniDV — are worse: the players are smaller, weirder, and even scarcer. Every year you wait, both sides of the equation get harder. This is the reason preservation-focused libraries and archives have been quietly pushing families to digitize now — not because there's a marketing push, but because the window is measurable and closing.
Option 1 — DIY with a USB capture device and a working VCR
The cheapest route, and the one that makes sense if you have three to five tapes and one working VCR you trust: buy a USB video-capture dongle (Elgato Video Capture, Diamond VC500, or one of the AGPTEK / Roxio equivalents; expect $30-80), plug the VCR's composite or S-Video output into the dongle, run the included software on your laptop, and start capturing in real time. 'Real time' is the key phrase — a 120-minute tape takes 120 minutes to capture, plus setup, plus review, plus re-encoding to a shareable format like MP4. Budget three to four hours end-to-end for the first tape, and one and a half to two hours each for tapes after that once you have the pipeline dialed in.
The quality ceiling is set by two things: the deck and the source tape. A garden-variety consumer VCR with worn heads will produce noisy, jittery captures no software can polish; a decently maintained S-VHS deck (JVC HR-S9800, Panasonic AG-1980, Sony SLV-R1000 — search prices before you commit) with a time-base corrector produces captures that hold up on a modern TV. If your source tapes are already showing tracking lines, color bleed or dropouts, none of that gets better in capture — you're recording the fault, permanently. Do a five-minute test capture before committing to a whole box, and be honest about whether the result is what you want your grandkids to see.
Option 2 — Mail-in professional services (the choice most families end up making)
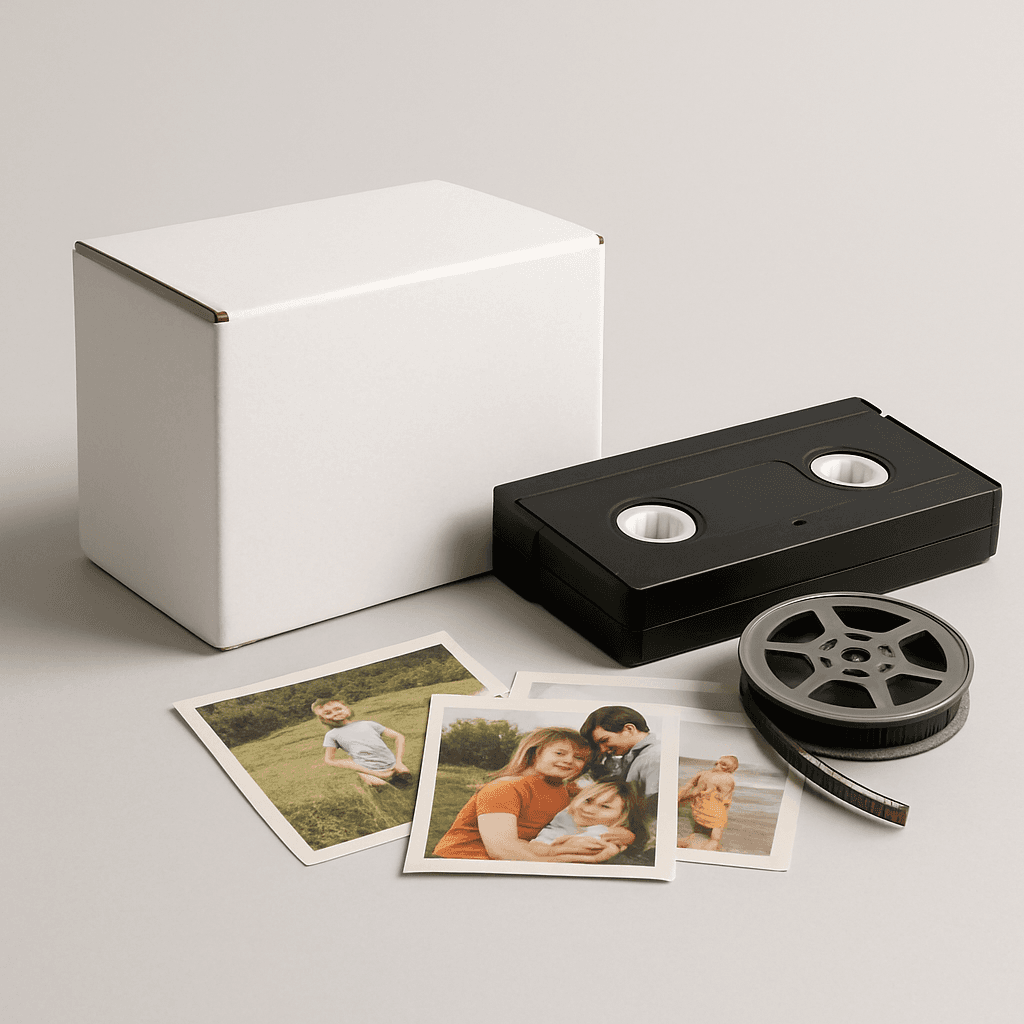
Mail-in digitization services exist precisely because most people don't have a working VCR, don't want to buy one, and don't want to spend forty hours capturing tapes in real time. You pay for a prepaid, trackable kit; you load it with your tapes, film reels, camcorder cassettes, slides and printed photos — usually mixed formats in one box — and ship it back. The service captures everything on professional equipment (properly maintained decks, time-base correctors, hardware color correction), stores it in a private online library you can stream and download, and mails your original tapes back to you.
iMemories is the largest of these — over a million families through the door — and it's the one we recommend for people with a mixed-format collection because it accepts nearly everything (VHS, VHS-C, Betamax, 8mm/Hi8/Digital8, MiniDV, 8mm and 16mm film reels, slides and printed photos) in a single SafeShip kit. You pay per item digitized after the starter kit, so total cost scales with your box size — a shoebox of ten to fifteen mixed items typically lands in the $200-400 range once you count the kit and per-item transfer fees. That's real money, but it's less than a used S-VHS deck plus your weekends for six weeks, and the quality ceiling is meaningfully higher.
The two honest catches are turnaround and trust. Turnaround runs weeks, not days, because good captures aren't fast and the box has to ship both ways. And you are handing your irreplaceable originals to a shipping company and a warehouse — the SafeShip tracking is genuinely reassuring, but if the idea of putting the only copy of your parents' wedding tape in a FedEx box keeps you up at night, either drive to a local shop instead or don't ship all of them at once. Doing half your collection, verifying the results are what you wanted, and shipping the second half is a perfectly valid strategy and one iMemories's per-project pricing makes easy.
Option 3 — Local video-transfer shops (a mixed bag, worth vetting carefully)
Every metro area has one or two independent video-transfer shops, usually run out of a strip mall or a photo lab. When they're good, they're excellent: you can drop tapes off in person (no shipping risk), meet the person who'll handle them, and often get a same-week turnaround for a smaller batch. When they're not, they use the same $50 USB capture dongle you would, on a worse VCR than you could source yourself, and charge you double what iMemories would.
The way to tell them apart is to ask three specific questions before you leave anything with them. First: what deck are you using for VHS, and does it have a time-base corrector? A specific answer (a JVC pro-series model, a dedicated TBC unit) is a good sign; 'a VCR we've had for years' is not. Second: what output format and bit-rate? You want at least H.264 at 15+ Mbps for VHS, or better yet ProRes/DV master files with H.264 web copies. Third: do I get a test capture before you do the whole batch? A serious shop will happily do a one-tape test for a nominal fee. If they hesitate on any of the three, keep looking. For a small, all-VHS collection where you can physically drop off, a good local shop can be the best of all worlds; for a mixed-format collection or if you're not sure how to vet, a mail-in service is the safer default.
How to prep your tapes before you convert (this makes a real quality difference)
Whatever route you pick, prepping the tapes gives you the best possible capture from source material you can't replace. Start by getting the tapes out of humid, hot storage — a garage, attic or basement — and into a climate-controlled room for at least a week; that alone can dry down surface moisture and reduce tape sticking. Give each cassette a quick visual: cracked shells, spilled tape, mold or visible stickiness get pulled aside and flagged for the shop or service (mail-in services can often still recover them but need to know). If a shell is cracked, ship it in a padded envelope inside the box; if tape has spilled out, don't try to wind it by hand — leave it, and let the shop handle the transplant.
Label everything. Whatever your family called the tape ('Christmas '89', 'Sarah's 2nd birthday', 'Dad's stuff'), write it on a piece of masking tape and stick it to the shell, and match a numbered list on paper going into the box. Nothing kills a digitization project like getting back thirty MP4 files named 'tape_01.mp4' with no idea what's on each. If you're using a mail-in service, most (including iMemories) let you attach the label text at the item level in the shipping form so the returned digital files come back named the way you wrote them — do this even for the tapes you think you'll recognize instantly, because you won't.
What actually can and can't be recovered
A tape that plays cleanly on a well-maintained deck captures cleanly — the digital file will look like the tape looked in 1994, no worse, no better. A tape with tracking lines, occasional dropouts, or slight color shifts captures with those artifacts baked in; hardware time-base correctors help, but they can't invent picture information that was never there. Faded color and dim contrast can be partially rescued in software during transfer if the shop or service does color correction (most professional services do, most DIY setups don't).
Sticky-shed tapes and mold-damaged tapes are edge cases only a real archival service can attempt — think tape baking in a temperature-controlled oven for hours, or careful mold remediation before winding. iMemories and other larger mail-in services do handle these; local shops sometimes will, sometimes won't. A tape that snapped inside the shell is often recoverable (a technician transplants the tape into a fresh donor shell). A tape that was recorded over with static or garbage is not — the original signal is physically gone. If a tape is precious, don't let a hobbyist or a home setup have the only shot at it; those cases are exactly why professional services exist.
What to do with the digital files once you have them
The single biggest mistake at this stage is putting the returned files in one place and considering the job done. A hard drive, an SSD, a laptop, even a cloud account are all single points of failure. The archival rule that works is 3-2-1: three copies, on two different types of media, one of them offsite. In practice for a family, that means the original MP4s on your computer, a second copy on an external SSD in a drawer, and a third copy in a cloud account (Google Drive, iCloud, Dropbox — pick one you actually pay for and won't cancel next year).
If the point of the whole project was to share the footage with relatives — a wedding video with the grandkids, old birthdays with siblings — pick the delivery method before you start. Emailing files individually falls apart at scale; burning DVDs is a downgrade and nobody has a player. Streaming from a private online library (which is what iMemories bundles with its service, or a service like Vimeo or a private YouTube channel if you're doing the DIY route) is what people actually use. And once the family tapes are safely digitized, do the boring next step: think about the newer photos and videos still piling up on phones and laptops. A one-click backup tool like ThePhotoStick Omni sweeps every photo and video off every device in one pass — worth doing so the family archive stays complete going forward, not just backward. For the paperwork that has to stay paper — birth certificates, deeds, passports — a fireproof grab-bag like the Ice Box is a $30 companion buy that pairs sensibly with the digital archive.
The realistic cost and time comparison, for the way most people actually decide
Say you have twenty tapes, mixed VHS and camcorder formats, plus a few dozen slides you'd like to include. DIY: $200-500 for the equipment (USB capture, a decent used VCR, maybe a slide scanner for the photos), plus 40-60 hours of your time over several weekends, with the ceiling on quality set by your gear. Local shop: $300-700 depending on hourly rate and format spread, one to three drop-off trips, one to three weeks turnaround, quality varies by shop. Mail-in service like iMemories: roughly $250-550 for a starter kit plus per-item transfer of that box, two to four weeks turnaround, mixed formats handled in one shipment, professional quality across the board, private online library included, originals returned.
For a small all-VHS collection where you already own a working VCR: DIY wins on cost. For a shoebox of mixed formats — which is what most family collections actually are — the mail-in service usually wins on cost-of-time, quality, and the fact that you don't have to source a working 8mm camcorder to play the tapes from your kid's third birthday. Either way, the wrong answer is 'later.' The math on tape degradation and VCR scarcity only gets worse from here.
Read our iMemories review
The mail-in professional digitization service that handles VHS, camcorder tapes, film reels, slides and printed photos in one SafeShip Kit — with your originals returned and a private streaming library you can share with the whole family.
Read our iMemories reviewFrequently asked questions
How do I convert VHS tapes to digital myself?
Buy a USB video-capture dongle ($30-80 — Elgato Video Capture, Diamond VC500 and similar are the common ones), plug your VCR's composite or S-Video output into it, run the included software on your laptop, and capture in real time. A 120-minute tape takes 120 minutes to capture, plus setup and re-encoding. The quality ceiling is set by two things: the VCR (a well-maintained S-VHS deck with a time-base corrector produces far cleaner captures than a garden-variety consumer VCR) and the source tape (tracking lines, color bleed and dropouts get baked into the file — capture doesn't 'clean' them). Do a five-minute test tape before committing to a whole box.
Is it worth paying a service to digitize old VHS tapes?
For a mixed-format collection — VHS plus camcorder tapes plus film reels plus slides — almost always yes, because you'd otherwise need to source a working VCR AND a working 8mm camcorder AND a working slide scanner and spend forty to sixty hours of your weekends running captures in real time. iMemories charges roughly $250-550 for a starter kit plus per-item transfer of a typical family shoebox, versus $200-500 in DIY equipment plus your time. For a small all-VHS collection where you already own a working VCR, DIY is cheaper. The mail-in service also captures on professionally maintained decks with hardware time-base correction, so the quality ceiling is higher than most home setups can reach.
How long do VHS tapes last before they degrade?
The Library of Congress's preservation guidance puts the useful shelf life of consumer VHS at 10-25 years under ideal (climate-controlled, low-humidity) storage. Most family tapes recorded in the 1980s and 1990s are now well past 25. The failure mode is chemical: the polyurethane binder holding the magnetic particles to the plastic base slowly absorbs moisture and breaks down into a sticky residue, causing 'sticky-shed syndrome' — the tape gums up the heads and can be unrecoverable in a season once it starts. Heat and humidity accelerate everything, so a tape stored in an attic or garage is dying materially faster than one in a closet. Digitize now, not next year.
Can iMemories digitize camcorder tapes, film reels and photos too?
Yes — that's the reason it's the recommended service for mixed-format collections. A single iMemories SafeShip Kit accepts VHS, VHS-C, Betamax, 8mm/Hi8/Digital8, MiniDV, 8mm and 16mm film reels, slides and printed photos — you can mix all of them in one shipment. That matters because most family collections aren't 'a stack of VHS' — they're a shoebox with three or four different formats, each of which would otherwise need its own player. Everything comes back in one private digital library.
What is sticky-shed syndrome, and can it be fixed?
Sticky-shed is the industry term for what happens when the binder holding the magnetic particles to a VHS tape has hydrolyzed — absorbed water and chemically broken down. Symptoms: the tape squeals when played, sticks to the heads, and leaves brown residue on the guides. Every play makes it worse. The temporary fix is 'tape baking' — heating the cassette at roughly 130-135°F in a dedicated oven for four to eight hours, which drives out moisture enough to allow one clean capture pass. This isn't something to attempt at home — the temperature control has to be exact and consumer ovens can't do it. Professional services like iMemories and specialist archival shops can handle sticky-shed tapes; local shops sometimes will, sometimes won't.
How do I store and back up the digitized files so I don't lose them?
The archival rule that actually works is 3-2-1: three copies, on two different types of media, one of them offsite. In practice: keep the original MP4s on your computer, a second copy on an external SSD in a drawer, and a third copy in a paid cloud account (iCloud, Google Drive or Dropbox — pick one you're not going to cancel next year). A single hard drive, laptop or cloud account is a single point of failure. For the newer photos and videos still piling up on phones and laptops going forward, a one-click backup tool like ThePhotoStick Omni sweeps every photo off every device in one pass and pairs sensibly with the digitized-tape archive.
Are DVDs a good way to preserve digitized home movies?
No — they're a downgrade, and increasingly nobody has a player to watch them on. Consumer DVDs are lower resolution than a good VHS capture (a DVD's roughly 720x480 with heavy compression, vs. a modern MP4 capture at native VHS resolution with a much higher bit-rate). Disc rot is real: cheap burnable DVDs are rated for a 10-30 year lifespan under ideal storage, less in a garage. And the last commonly shipping laptops with optical drives were sold years ago. If a mail-in service offers DVDs as a delivery option, take the digital files instead and skip the DVDs; if you have older DVDs of already-digitized footage, rip the video files off them now while you can still find a drive.
TopCrate is reader-supported. When you buy through links on our site we may earn an affiliate commission, at no extra cost to you. Content is for general information and isn't a substitute for professional advice.