HOW TO
How to Use ThePhotoStick Omni on iPhone, Android, Windows and Mac: Setup, First Backup and Common Snags (2026)
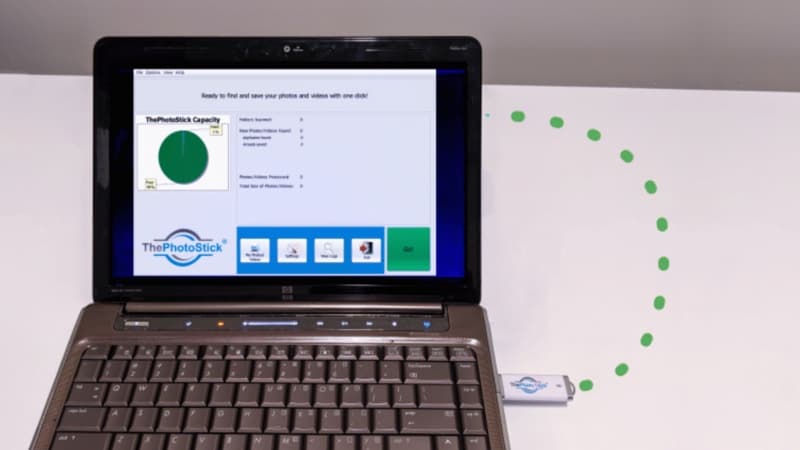
ThePhotoStick Omni sales page says plug it in, hit Go, done. The official setup guides add a few steps per device: an app on phones, a one-time installer that lives on the stick for computers, and permissions you have to allow. Here is each setup, step by step, from ThePhotoStick's own guides.
To use ThePhotoStick Omni, plug it into your phone or computer, open ThePhotoStick Omni app (on a phone) or run the installer stored on the stick itself (on a Windows PC or Mac), allow it access to your files, and start the backup. The sales page boils this down to three words: plug it in, hit Go, done. That is close to the truth once setup is finished, but the first run has a few extra steps, and most of the problems people hit come from skipping one of them.
Below is the setup for each device type, taken from ThePhotoStick's own getting-started guides on thephotostick.com and its FAQ, plus what the GiddyUp offer page for the Omni promises. If you have not bought one yet, our ThePhotoStick Omni review covers whether it is worth the money, and our guide on where to buy ThePhotoStick Omni explains which seller backs the guarantee.
What ThePhotoStick Omni does before you start
ThePhotoStick Omni is a backup drive that comes with its own software. When you start a backup, the software searches the device for photos, videos and other files, skips duplicates if you leave that option on, and copies everything to the stick. The offer page says it supports over 100 file types, including photos, videos, documents, voice memos and music, and works with Windows computers, Mac computers, iPhones, Android phones and tablets such as the iPad and Galaxy models.
It copies files. It does not move them. ThePhotoStick's FAQ says the Omni backs up your files without ever deleting them from your device, and that it will not remove anything from your computer, including duplicate files. So after a backup the originals stay on your phone or computer. If you want to free up space, you delete them yourself after checking the copy.
One thing to check first: ThePhotoStick's help center has separate guides for the Omni and a model called the Omni X, and some pages mention both. The steps below are for ThePhotoStick Omni. If the box says Omni X, follow that model's guide.
Check ThePhotoStick Omni system requirements and connectors
ThePhotoStick's support page lists these minimums: Windows 7 SP1 or later, Mac OS X 10.13 or later, iOS and iPadOS 13.0 or later, and Android 8.0 or later. The Android guide adds that on Google Pixel phones, the Omni only works with the Pixel 8 and later. Earlier Pixel models are not supported.
For connections, the Windows guide says to use the USB-A or USB-C plug, the Mac guide says to use the USB-C plug, the iPhone guide covers both Lightning and USB-C ports, and the Android guide covers Micro-USB and USB-C. A red LED on the stick lights up when it is connected. If it does not light, the most common fix in the official guides is simple: take the phone out of its case, because some cases stop the plug from seating fully.
How to use ThePhotoStick Omni on iPhone and iPad
Phones need an app. That surprises people, because the offer page says there is no software to install, and the FAQ says the Omni does not need to install anything on your computer. On an iPhone or iPad, though, the official guide starts with installing the free ThePhotoStick Omni app from the App Store, either by searching for it or by scanning the QR code in the Quick Start Guide that comes in the box.
Then follow these steps from ThePhotoStick's iOS guide. Open the app and accept its permissions. Plug the stick into the Lightning or USB-C port and wait for the red light. Tap GET STARTED, watch the short tutorial video, and tap CONNECT. Tap BROWSE in the lower right, choose the drive named PHOTOSTICK, tap OPEN in the upper right, then tap BACK TO HOME. Now tap BACK UP FILES NOW. When iOS asks, choose Allow Full Access so the app can see your whole photo library, not just the photos you pick.
You then get three choices: BACK UP ALL FILES, BACK UP SELECTED FILES, or ADVANCED: SELECTED FILE TYPES, which lets you limit the backup to images, videos, contacts, audio or documents. You can tap PAUSE BACKUP and RESUME BACKUP without losing progress. When it finishes, VIEW FILES on the home screen shows what was saved. The guide also says some phones list the drive as a generic USB device rather than PHOTOSTICK, so pick that if PHOTOSTICK is not shown.
How to use ThePhotoStick Omni on Android
The Android setup is similar but has one extra permission. Install the free ThePhotoStick Omni app from Google Play. Open it, and if it asks for All Files Access, allow it and tap the back arrow in the upper left. Plug in the stick and wait for the red LED, then tap GET STARTED, watch the tutorial, and tap CONNECT.
Next, tell the app where the stick is. Open the Options Menu (the three lines in the upper left), select the drive named PHOTOSTICK (or generic USB device), and tap USE THIS FOLDER. When prompted, tap ALLOW to grant All Files Access again, return with the back arrow, and tap BACK TO HOME. Then tap BACK UP FILES NOW and pick the same options as on the iPhone: everything, hand-picked files, or selected file types.
If the backup misses files or will not start, the guide's fix is to check the permission. All Files Access must be on. If you denied it by mistake, turn on full media library access in the app's Settings menu.
How to use ThePhotoStick Omni on a Windows PC or Mac
On a computer there is nothing to download, but there is a one-time installer, and it lives on the stick. On Windows, plug the Omni into a USB-A or USB-C port, open the ThePhotoStick Omni drive in File Explorer, and double-click the file named Install_ThePhotoStick_Omni_Windows. Click Next, Next, Install and Finish. If Windows asks for permission to make changes, choose Yes. The software opens when the install is done, and the official user guide describes two ways to start a backup: a Backup Wizard and a Go button.
On a Mac, plug in the USB-C end, open the drive named PHOTOSTICK in Finder, and double-click Install_ThePhotoStick_Omni_macOS.dmg. Drag ThePhotoStickOmni into your Applications folder and open it from there. macOS may show a security warning the first time. ThePhotoStick's Mac guide says to open System Settings, go to Privacy & Security, scroll to the Security section, click Open Anyway next to the ThePhotoStick Omni message, then click Open to confirm.
That is how the FAQ's no-installation line and the installer steps fit together: the program comes on the stick, so you never download anything. On iPhone and Android, though, you do download the app from the store.
After the first backup: keeping ThePhotoStick Omni current
ThePhotoStick Omni is not a live sync. It saves what is on the device at the moment you run it. ThePhotoStick's FAQ says many people leave it plugged into a computer and back up weekly. The offer page also mentions weekly backups of new files. On a phone, the habit is to plug in and run it again after a trip, an event, or once a month. With Skip Duplicates checked, the FAQ says only one copy of each file is saved, so repeat backups add the new photos rather than filling the stick with copies.
Two practical tips from the official guides. First, charge the phone fully before a large first backup, because it can take a while. Second, allow the app's notifications, which the iOS guide strongly recommends so the app stays up to date. One App Store reviewer reported a first backup taking four to five hours, so start your first run when you can leave the phone alone.
If you shoot on an iPhone, many of your photos are HEIC files. ThePhotoStick's FAQ says HEIC files are recognized in its Photo Organizer tool but thumbnails may not appear on a computer without the right codec installed. The files are still saved even if the preview is blank.
Which ThePhotoStick Omni size to pick, and the refund window
On November 9, 2026, the GiddyUp offer page for ThePhotoStick Omni listed four sizes: 32GB for $69.99, 64GB for $89.99, 128GB for $109.99 and 256GB for $149.99. The page's capacity copy is inconsistent. One section says up to 60,000 photos and videos, another says up to 120,000, so go by gigabytes instead. Check how much space photos and videos use on your phone (Settings, then Storage) and buy the next size up.
The offer page promises a 30-day money-back guarantee. ThePhotoStick's FAQ gives the details: returns for any reason within 30 days of delivery, started by emailing returns@thephotostick.com. Shipping, handling and taxes are not refunded, and you pay return postage. So run your first backup on every device you own in the first week, while a return is still easy. General support is at support@thephotostick.com, with 24/7 support and a live chat on thephotostick.com.
TopCrate earns a commission if you buy through our link to the GiddyUp offer page. That does not change the price or the guarantee.
ThePhotoStick Omni vs ThePhotoStick, ThePhotoStick Mobile and SanDisk iXpand
Searches for ThePhotoStick Omni often turn up three other products. The original ThePhotoStick and ThePhotoStick Mobile come from the same company as the Omni, but they are different products. The original is for computers only and ThePhotoStick Mobile is for phones only, so their setup steps differ from the Omni's. Make sure the guide you follow matches the name on your box.
SanDisk's iXpand flash drives come from a different company altogether. They do a similar job with their own app. Our ThePhotoStick Omni vs SanDisk iXpand comparison explains where each one wins, and if you are worried about a knock-off, is ThePhotoStick Omni legit shows what the real product and its guarantee look like.
Read our full ThePhotoStick Omni review
Is the one-click backup stick worth $69.99 to $149.99? Our review covers the four sizes, who it suits and where cloud backup is the better buy.
Read our full ThePhotoStick Omni review →Frequently asked questions
How do I use ThePhotoStick Omni for the first time?
On a phone, install the free ThePhotoStick Omni app, plug in the stick, tap GET STARTED and CONNECT, select the PHOTOSTICK drive, then tap BACK UP FILES NOW and allow full access. On a Windows PC or Mac, open the PHOTOSTICK drive and run the installer stored on it, then start the backup from the software.
Do I need an app for ThePhotoStick Omni?
On iPhone, iPad and Android, yes. ThePhotoStick's official guides start with installing the free ThePhotoStick Omni app from the App Store or Google Play. On computers you don't download anything, but you do run a one-time installer that is stored on the stick.
Why isn't my phone recognizing ThePhotoStick Omni?
Check that the red LED is on. ThePhotoStick's guides say some phone cases stop the plug from seating, so remove the case. Make sure the phone meets the minimum (iOS 13 or Android 8.0), and on a Google Pixel note that only the Pixel 8 and later are supported. The drive may also be listed as a generic USB device instead of PHOTOSTICK.
Does ThePhotoStick Omni delete photos from my phone?
No. ThePhotoStick's FAQ says the Omni backs up files without ever deleting them from your device. It copies them to the stick, so you decide whether to delete the originals afterward.
How often should I back up with ThePhotoStick Omni?
ThePhotoStick's FAQ says many people back up weekly. On a phone, once a month or after big events works for most people. With Skip Duplicates on, each new backup only adds files that aren't already on the stick.
Can I return ThePhotoStick Omni if it doesn't work with my device?
Yes, within 30 days of delivery. Email returns@thephotostick.com to start the return. Shipping, handling and taxes are not refunded and you pay return postage, so test it on every device in the first week. See our ThePhotoStick Omni review for the full verdict.
TopCrate is reader-supported. When you buy through links on our site we may earn an affiliate commission, at no extra cost to you. Content is for general information and isn't a substitute for professional advice.