COFFEE 101
How to Clean a Keurig: The 15-Minute Routine That Fixes Weird-Tasting Coffee
The simple cleaning routine Keurig owners skip — removable parts, the paperclip needle trick, and how to know when cleaning alone won't cut it.
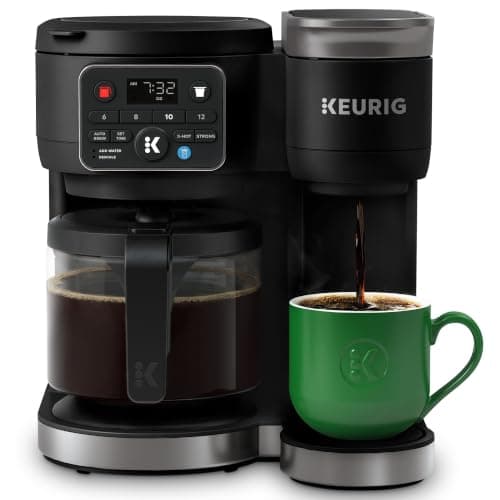
Your Keurig touches hot water, coffee grounds, and the occasional exploded pod every single day — and most people never clean anything but the mug. If your coffee has started tasting flat, bitter, or vaguely like the last hot cocoa pod you ran, the machine is telling you it's overdue. The good news: a proper cleaning takes about 15 minutes, uses things you already own, and the difference shows up in the very next cup.
This guide covers the whole routine — the daily and weekly habits that prevent gunk in the first place, how to wash every removable part, the paperclip trick for a clogged exit needle, and how to tell when cleaning is no longer the problem and mineral scale is. It applies to every model, whether you run a full-size Keurig K-Duo on the counter or a Keurig K-Mini in a dorm room.
Daily and weekly habits that do most of the work
Daily, the job is almost nothing: empty the drip tray if it's collecting overflow, leave the lid open for a few minutes after your last brew so the pod chamber can dry out, and use fresh water rather than topping off week-old reservoir water. Stale, standing water is where off-flavors start.
Weekly, give the machine five real minutes: wash the removable parts (next section), wipe down the exterior with a damp cloth, and run one water-only brew cycle — lift the handle, no pod, close it, hit the largest cup size, and dump the hot water. That single rinse flushes out the drops of old coffee and cocoa residue sitting in the brew path.
Wash the removable parts in warm, soapy water
Unplug the brewer first — you'll be working near sharp needles and electrical parts. Then pull off everything that comes off: the water reservoir and its lid, the drip tray and drip tray plate, and the pod holder with its funnel. On most models the pod holder pops out if you push up on the bottom of it from underneath while lifting the handle.
The pod holder and funnel can go in warm, soapy water (Keurig says they're top-rack dishwasher safe on most models, but a quick hand wash is faster). The drip tray gets the same treatment — it collects more sticky splatter than any other part. Rinse everything well and let it dry before reassembling.
The paperclip trick for the exit needle
If your Keurig is brewing slowly, leaving grounds in your cup, or only filling half a mug, the usual culprit is a clogged needle. There are two: the entrance needle under the lid that punctures the top of the pod, and the exit needle in the bottom of the pod holder that punctures the bottom.
With the machine unplugged and the pod holder removed, separate the funnel from the pod holder and look at the small tube on the underside — that's the exit needle. Straighten a paperclip, insert it into the tube, and wiggle it around for a few seconds to loosen packed coffee grounds, then rinse the holder under running water. Do the same for the entrance needle under the lid: carefully insert the paperclip into the holes beside the needle and work the grounds free. Those needles are genuinely sharp, so go slow.
Reassemble everything, plug the brewer back in, and run a water-only cleansing brew before your next coffee to flush out anything you dislodged.
Clean the water reservoir — without soap residue
The reservoir deserves special handling. Wash it and its lid by hand with a soft cloth — skip the dishwasher — and if you do use a little dish soap, rinse it obsessively. Any soap film left behind gets pumped straight into your next ten cups of coffee, and sudsy hazelnut is nobody's order. Plenty of owners skip soap here entirely and just scrub with warm water and a clean cloth.
One counterintuitive tip straight from Keurig: don't dry the inside of the reservoir with a towel. Cloth fibers cling to the walls and end up in the brew line. Let it air-dry, or refill it right away. If your model has a water filter cartridge, this is also your reminder that Keurig recommends replacing it roughly every two months.
When cleaning isn't enough: time to descale
Soap and paperclips fix coffee residue, but they do nothing about mineral scale — the chalky calcium buildup that hard water leaves inside the heater and water lines where you can't reach. If your machine is slow, noisy, sputtering, or short-pouring even after a full cleaning, or the descale light is on, scale is the problem.
Descaling is a separate process that uses an acidic solution to dissolve that buildup from the inside, and Keurig recommends doing it every three months or so. We've written a full walkthrough on how to descale a Keurig, including the honest vinegar-versus-solution comparison and how to get the descale light to turn off.
Read our Keurig K-Duo review
If your current brewer is past saving, the K-Duo's pod-plus-carafe combo is the one we'd put on the counter next.
Read our Keurig K-Duo reviewFrequently asked questions
How often should I clean my Keurig?
Rinse the drip tray and use fresh reservoir water daily, wash the removable parts (reservoir, drip tray, pod holder) weekly, check the needles monthly or whenever brewing slows, and descale every three months — more often if you have hard water.
Can Keurig parts go in the dishwasher?
The pod holder, funnel, and drip tray are top-rack dishwasher safe on most models. The water reservoir and its lid should be hand-washed only — and rinsed extremely well so no soap residue ends up in your coffee.
Why does my Keurig coffee taste bad even with a fresh pod?
Usually one of three things: stale water sitting in the reservoir, old coffee and cocoa residue in the pod chamber and needles, or mineral scale inside the machine. Fresh water and a cleaning fix the first two; only descaling fixes the third.
How do I unclog a Keurig needle?
Unplug the machine, remove the pod holder, and insert a straightened paperclip into the exit needle tube on the underside, wiggling to loosen packed grounds. Do the same carefully around the entrance needle under the lid, then rinse the parts and run a water-only brew.
Can I run soapy water through my Keurig to clean it?
No. Soap in the internal water lines is very hard to rinse out and will flavor your coffee for days. The inside of the machine gets cleaned with water-only brew cycles and, for mineral buildup, a proper descaling — never soap.
Do I still need to clean my Keurig if I use filtered or bottled water?
Yes. Filtered water slows mineral scale but does nothing about coffee oils, grounds, and residue in the pod chamber, needles, and drip tray. The weekly wash-and-rinse routine applies no matter what water you use.
TopCrate is reader-supported. When you buy through links on our site we may earn an affiliate commission, at no extra cost to you. Content is for general information and isn't a substitute for professional advice.